
(DISCLAIMER: I am not a doctor, and you should consult your healthcare professional before starting any health regimen. Product links are commissioned and supports the blog)

Key takeaways before you mix anything
- Always dilute peppermint oil in a carrier oil before it touches skin.
- Start with a small amount, then increase only if your skin likes it.
- Apply it to temples, the back of the neck, or behind the ears.
- Keep it away from your eyes, nostrils, and broken skin.
- Patch test first, especially if your skin is sensitive.
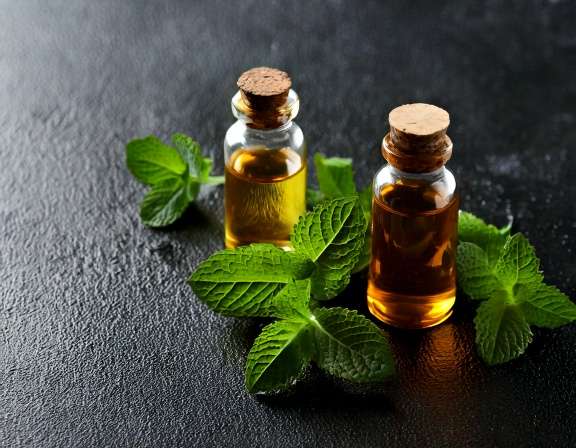
When your head feels tight and the day keeps pressing on, a small minty roller can feel like a pocket-sized pause. A peppermint essential oil roller is a simple blend you roll onto the skin for a cool scent and a quick moment of comfort.
People often reach for it during headache season because it’s easy to carry and easy to use. This blend is for comfort, not a cure, and the recipe below keeps things gentle enough for everyday life.
Why peppermint feels so helpful when headaches start to build
Peppermint has a sharp, clean scent, and its menthol content creates that familiar cooling feeling. When your head feels heavy, that chill can feel like a small reset.
Many people also use it as part of a quiet routine. A glass of water, a few slow breaths, and a few minutes away from bright screens can make the whole moment feel calmer. If you want more simple at-home ideas, natural remedies for headaches and nausea is a helpful companion read.
The real appeal is how simple it is. No complicated setup, no messy measuring each time, and no strong smell lingering in the room for hours. A roller gives you a quick, controlled way to use peppermint when you need a little sensory comfort.
What peppermint may do on the skin
On skin, peppermint can feel like a cool breeze on a warm day. That sensation is the main reason people like it for headache season.
Still, dilution matters. Undiluted peppermint essential oil can sting or feel too sharp, especially on delicate skin. A carrier oil softens the contact and spreads the scent more evenly, so the blend feels smoother and less intense.
A lighter mix also gives you more control. You can always add a second pass later, but you can’t take away a blend that feels too strong.
When a roller blend makes the most sense
A roller is useful when you want something quick and portable. It fits into a bag, a desk drawer, or a car cup holder without much fuss.
That makes it a good choice for screen-heavy days, travel stress, stuffy rooms, or long afternoons when your neck starts to tighten. Because it’s already mixed, you can use it in a few seconds and move on with your day.
If you like keeping a small home remedy shelf, peppermint oil in a natural first aid kit fits that same practical mindset.
What you need for a simple 10 ml roller bottle
A 10 ml bottle is a smart starter size. It’s small enough to test without wasting ingredients, yet big enough to keep close by.
For one gentle roller, gather these basics:
- 1 empty 10 ml roller bottle with a roller top
- Peppermint essential oil
- A carrier oil, such as fractionated coconut oil, jojoba oil, or sweet almond oil
- A small funnel or dropper, if you want cleaner filling
- A label and pen
Choosing a carrier oil that feels light on skin
The carrier oil matters because it shapes how the blend feels. Fractionated coconut oil is light, neutral, and easy to find. Jojoba has a smooth feel and works well for daily use. Sweet almond oil is another soft choice, though anyone with nut allergies should skip it.
A neutral carrier keeps the peppermint note clear without making the roller greasy. That matters if you plan to wear it during the day.
A few extras that make the process easier
A paper towel is handy for catching drips. A small bowl keeps the bottle steady while you fill it. A label helps you remember what’s inside, which matters more than it seems when several bottles sit together.
How to make the peppermint roller blend step by step
For a gentle 10 ml roller, start with 4 to 6 drops of peppermint essential oil. If you want a stronger scent, you can use up to 10 drops, but that’s not the best place to begin if your skin is sensitive.
- Add the peppermint essential oil to the empty roller bottle.
- Fill the rest of the bottle with carrier oil, leaving a little space at the top.
- Put the roller ball and cap on tightly.
- Shake the bottle gently for a few seconds.
- Label it with the oil name and the date you made it.
That’s it. The blend is ready as soon as it’s mixed, though it often feels best after sitting for a few minutes. If the roller top feels loose or oily, wipe the rim before you cap it again.
A stronger scent is not a better blend. Start small, then see how your skin responds.
A gentle version for sensitive skin
If you’re new to essential oils, start on the mild side. Four drops in 10 ml is a comfortable place to begin. If your skin is very reactive, try 2 to 3 drops and test how it feels before making a second bottle.
This slower approach makes sense because peppermint can feel sharp on some skin. A softer mix still gives you that fresh, cooling scent without overwhelming your senses.
How to label and store it safely
Write “Peppermint Roller” on the label, along with the date you made it. That way, you’ll know what’s inside and how fresh it is.
Store the bottle in a cool, dark place, away from a sunny windowsill or a hot car. Keep the cap tight so the scent stays crisp and the oil stays clean.
How to use it during headache season without overdoing it
Use a small amount first. One light pass on the skin is enough to test the feel and the scent.
Apply it to the temples, the back of the neck, or behind the ears. Then pause for a minute. If it feels pleasant, you can repeat once more. If it feels too strong, wipe the area with a little carrier oil or wash the skin with mild soap.
The goal is comfort, not a heavy scent cloud. A little goes a long way with peppermint.
Best places to roll it on
The temples are the most common spot because they’re easy to reach and close to where many people feel tension. The hairline can work too, as long as you stay away from the eyes.
The back of the neck is another good choice, especially when stress feels like it’s sitting in your shoulders. Behind the ears can also feel nice, but keep the blend away from your nostrils and any broken skin.
Helpful habits that pair well with the blend
A roller works best when it joins a calm routine. Drink some water, step into a quieter room, or lower the brightness on your screen.
A slow breath helps too. Inhale through your nose, exhale through your mouth, and give the cooling scent a minute to settle. If you have time, a cool cloth on your forehead can make the whole moment feel more restful.
Safety notes every peppermint roller user should know
Patch testing matters, even with a gentle blend. Put a small amount on one spot of skin and wait to see how it reacts.
Never use peppermint essential oil undiluted on your skin. Keep it away from your eyes, mouth, and inside your nose. If it burns, stings, or leaves a rash, stop using it right away.
Be careful with children, babies, pregnancy, breastfeeding, and very sensitive skin. When in doubt, ask a healthcare professional before using it.
Persistent, severe, or unusual headaches should also be checked by a healthcare professional. A roller can be part of a comfort routine, but it shouldn’t replace proper care when symptoms feel wrong or keep coming back.
Conclusion
A peppermint roller is small, simple, and easy to keep close when headache season shows up. With a light dilution and the right carrier oil, it can fit neatly into a calm, natural routine.
Make one bottle, test it gently, and adjust the strength to match your skin. Then tuck it away for the next heavy day, when a cool scent and a quiet pause are exactly what you need.
Stay Connected for More Natural Living Inspiration
If you enjoyed this post about herbal wellness and love discovering natural ways to refresh your home and wellness, don’t miss out on future recipes and clean-living tips! Subscribe to the blog for weekly DIYs, wellness inspiration, and herbal remedies delivered straight to your inbox.
Don’t forget to visit my Amazon storefront for the links to my favorite essential oils, herbal teas, and natural recipes. I also create YouTube ambiance videos for sleeping; a channel I created to help people who have trouble sleeping. The link to all social media content is here.
Thanks for coming by!



Leave a Reply