
(DISCLAIMER: I am not a doctor, and you should consult your healthcare professional before starting any health regimen. Product links are commissioned and supports the blog)

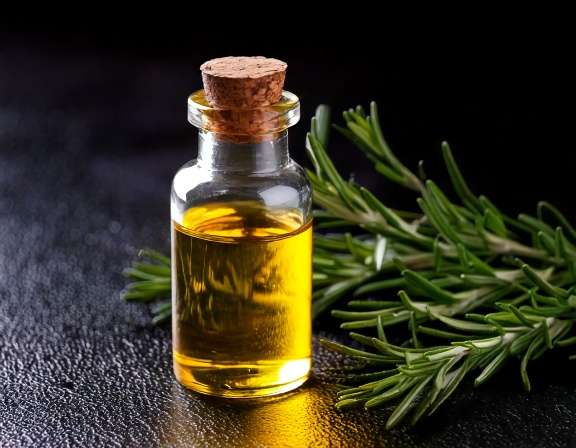
Dry, tired hair often comes with a scalp that feels tight, itchy, or overlooked. A warm shower may soften the strands, but it doesn’t always give your scalp the care it needs. A diluted rosemary essential oil blend can turn wash day into a calming pre-shampoo ritual without requiring expensive products.
The carrier oil provides most of the softness and slip. Rosemary essential oil adds a concentrated botanical touch, but it isn’t a stand-alone moisturizer for hair strands. Below, you’ll find three easy recipes, carrier oil tips, massage steps, timing guidance, and safety advice for getting started.
Key Takeaways for a Simple Rosemary Scalp Massage
- Begin with about 3 to 5 drops of rosemary essential oil per 1 tablespoon of carrier oil.
- Use your fingertips and finger pads, never your fingernails, to massage the scalp.
- A gentle 3 to 10 minute massage is enough. Harder pressure won’t improve the result.
- Leave the blend on for 30 to 60 minutes as a pre-shampoo treatment.
- Carrier oils provide most of the conditioning, while rosemary essential oil is a diluted scalp-care addition.
- Patch test first, and stop using the blend if burning, rash, swelling, or other irritation develops.
How to Make a Simple Rosemary Essential Oil Scalp Massage Blend
Start with a clean, small bowl if you’re making one treatment. You can also mix the oils in a clean, dark glass bottle and store it in a cool cabinet. Since homemade blends don’t contain preservatives, make small batches and keep water out of the bottle.
Choose the carrier oil according to your hair’s texture and your scalp’s preference. Jojoba oil feels light and spreads easily. Coconut oil offers richer dry-hair care, although it may weigh down fine hair. Argan oil adds softness and slip, while sweet almond oil creates a smooth blend that’s easy to distribute.
For most adults, 3 to 5 drops per tablespoon gives you a practical starting point. Sensitive scalps may need a weaker blend, so begin with fewer drops and observe how your skin responds.
Recipe 1: Everyday Jojoba Scalp Blend
- 1 tablespoon jojoba oil
- 3 drops rosemary essential oil
Add both oils to a small bowl and stir gently. Part your hair in several places, then apply the mixture mainly to your scalp. Massage with your fingertips for 5 minutes, leave it on for 30 to 60 minutes, and shampoo well. This light blend is a sensible first choice for most hair types.
Recipe 2: Rich Coconut and Argan Dry-Hair Blend
- 1 tablespoon coconut oil
- 1 tablespoon argan oil
- 4 drops rosemary essential oil
If the coconut oil is firm, warm the carrier oils only slightly until they become fluid. Never heat the essential oil. Add the rosemary essential oil after warming, then mix thoroughly. Massage the blend into your scalp for 5 to 10 minutes, leave it on for up to 60 minutes, and rinse thoroughly before shampooing. Coconut oil can feel heavy on fine hair, while argan oil adds slip and helps the mixture spread more easily.
Recipe 3: Lightweight Sweet Almond Pre-Wash Blend
- 2 teaspoons sweet almond oil
- 2 drops rosemary essential oil
Mix the oils in your palm or a small dish. Apply a small amount to the scalp and, if needed, touch the remainder onto dry ends. Leave it on for at least 30 minutes, then wash your hair as usual. This smaller batch suits short hair, fine hair, or anyone trying a scalp oil for the first time. If you have a nut allergy, choose jojoba oil or another carrier that you know your skin tolerates.
For more herbal options, you can also explore these easy DIY rosemary recipes for hair and body care.
How to Apply the Blend Without Weighing Down Your Hair
Apply the oil to a dry or slightly damp scalp. A wet scalp can dilute the blend and make it harder to tell how much product you’ve used. Begin with a small amount, because the goal is to lightly coat the scalp rather than soak the roots.
- Make several narrow parts with your fingers, especially around the hairline, crown, and areas that feel dry.
- Dab a little oil along each part, then spread it with the pads of your fingers.
- Move in slow, small circles without scratching or dragging your nails across the skin.
- Continue for 3 to 10 minutes, using gentle pressure.
- Leave the treatment on for 30 to 60 minutes before shampooing.
More oil and stronger pressure won’t improve the treatment. Too much product can leave the roots greasy and require repeated washing. If your hair still feels oily after one shampoo, wash twice with a mild cleanser. Follow with conditioner on the lengths and ends.
Keep the main application on the scalp. Dry ends may need a separate conditioner or one tiny drop of plain argan or jojoba oil. Start once a week, then adjust according to how your scalp and hair respond.
What Rosemary Essential Oil Can and Cannot Do for Dry, Tired Hair
Rosemary essential oil is commonly included in scalp massage routines because its scent feels fresh and its concentrated plant compounds are often studied for scalp care. Small studies have examined rosemary oil in hair-loss routines, but the evidence remains limited. Research on rosemary oil doesn’t prove that a homemade blend will regrow hair for everyone.
The oil also doesn’t replace a conditioner. Hair strands are nonliving fibers, so rosemary essential oil won’t repair split ends or supply the moisture that dry lengths need. Jojoba, coconut, argan, or sweet almond oil provides the blend’s softness and reduces friction during the massage.
Massage itself can make a routine feel soothing. Gentle fingertip movements may support a healthy-feeling scalp and help you slow down during a busy wash day. Still, dry or frizzy hair can have many causes, including heat styling, harsh cleansers, product buildup, cold weather, low humidity, or chemical processing.
Rosemary oil isn’t a proven cure for dandruff, eczema, psoriasis, or other scalp conditions. Seek medical advice if you have sudden hair loss, severe itching, pain, sores, thick scaling, or flaking that continues despite basic care. A dermatologist can identify the cause instead of leaving you to guess with home remedies.
Common mistakes include:
- Applying rosemary essential oil directly to the scalp.
- Adding extra drops because the blend seems too mild.
- Using oil on broken, inflamed, or sunburned skin.
- Leaving a heavy treatment on overnight without knowing how your scalp reacts.
- Expecting an immediate change in dryness, shedding, or hair thickness.
Readers interested in a broader routine can review this guide to using rosemary oil for a healthy scalp, especially when considering consistency and scalp comfort.
Essential Oil Safety Before Your First Scalp Massage
Rosemary essential oil is highly concentrated. Never apply it directly to your scalp, hairline, or skin. Always mix it with a carrier oil, and measure the drops rather than pouring by eye.
Patch test the same diluted blend you plan to use. Apply a small amount to the inner arm or behind the ear, then observe the area for 24 hours. A clear patch test doesn’t guarantee that your scalp will never react, but it gives you a safer starting point.
Keep the blend away from your eyes, nose, mouth, and broken or inflamed skin. Wash your hands after applying it, and don’t swallow essential oils. Store the bottle tightly closed, away from children, heat, and pets.
Ask a qualified health professional before topical use if you’re pregnant, breastfeeding, managing epilepsy, taking prescription medicines, or preparing the blend for a child. Product labels may also include age restrictions or additional warnings, so read them before use.
Stop immediately if you notice burning, swelling, a spreading rash, dizziness, or breathing trouble. Rinse the area with a gentle cleanser and seek appropriate medical help for severe symptoms or breathing changes.
Frequently Asked Questions
Can I use rosemary essential oil on my hair ends?
You can apply a properly diluted blend to dry ends, but the scalp is the main target of this routine. Hair lengths usually benefit more from conditioner or a very small amount of plain carrier oil. Avoid saturating the ends, since excess oil can make them look dull or limp.
Should I use a scalp massager with the oil blend?
Your fingertips are enough, and they make it easier to control pressure. A silicone scalp brush can work if it has soft, flexible tips, but don’t scrub aggressively. Stop if the tool pulls hair or leaves the skin tender.
Can I leave the blend on overnight?
A 30 to 60 minute pre-shampoo treatment is a safer starting point. Overnight use gives the oil longer contact with your skin and may increase the chance of irritation, clogged follicles, or a greasy buildup. Test shorter treatments first and wash the blend out thoroughly.
How should I wash an oily scalp after the treatment?
Apply shampoo directly to the scalp before adding much water, then massage gently and rinse. Repeat if the roots still feel coated. Condition the middle lengths and ends, but avoid adding more conditioner to an already oily scalp.
How long should I try the routine before changing the recipe?
Use one blend once weekly for several weeks while watching your scalp and hair texture. Change only one factor at a time, such as the carrier oil or the amount used. Stop rather than adjust if you develop irritation.
Conclusion
A simple diluted blend can make scalp care feel more thoughtful without adding much cost or time. Begin with about 3 to 5 drops of rosemary essential oil per tablespoon of carrier oil, massage gently for a few minutes, and leave it on for 30 to 60 minutes before shampooing.
Patch testing matters, and realistic expectations matter just as much. Rosemary essential oil is a scalp-care addition, while the carrier oil supplies most of the softness. Start with the light jojoba recipe, then adjust only after you see how your scalp and hair respond. With patience, wash day can become a calmer ritual for dry, tired hair.
Stay Connected for More Natural Living Inspiration
If you enjoyed this post about herbal wellness and love discovering natural ways to refresh your home and wellness, don’t miss out on future recipes and clean-living tips! Subscribe to the blog for weekly DIYs, wellness inspiration, and herbal remedies delivered straight to your inbox.
Don’t forget to visit my Amazon storefront for the links to my favorite essential oils, herbal teas, and natural recipes. I also create YouTube ambiance videos for sleeping; a channel I created to help people who have trouble sleeping. The link to all social media content is here.
Thanks for coming by!

Leave a Reply